
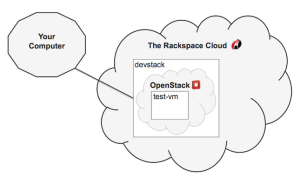
 Here’s how to deploy DevStack for OpenStack on the Rackspace Cloud. You can use DevStack for testing/development of OpenStack or just learning a bit more about OpenStack and how all of the pieces fit together.
The services deployed from following the instructions here are:
- Identity (Keystone)
- Compute (Nova)
- Network (Neutron)
- Object Storage (Swift)
- Image (Glance)
- Block Storage (Cinder)
- Orchestration (Heat)
- Messaging (Zaqar)
- Dashboard (Horizon)
If you don’t have a Rackspace Cloud account, I recommend using the Developer+ free credit to try this out.
 In the instructions below you’ll need to replace
 MY_OPENSTACK_VERSION with one of these branch names (minus the stable/ prefix). The branch names are the code names for a particular version of OpenStack. e.g. stable/MY_OPENSTACK_VERSION becomes stable/juno. You’ll also need to replace MY_DEVSTACK_PASSWORD with one of your choosing.
-
Go to the Cloud Control Panel
-
Click Create Server
- Name: devstack
- Image: Ubuntu 14.04 LTS (Trusty Tahr) (PVHVM)
-
Flavor: Performance 1 > 4GB Performance (you might get away with 2 GB)
-
Click Create Server and note the password and IPv4 address (when it appears)
-
When your server is Active, switch to a Terminal and run the following commands:
ssh root@my.ip.v4.address apt-get -y update apt-get -y install git git clone https://github.com/openstack-dev/devstack.git -b stable/MY_OPENSTACK_VERSION devstack/ devstack/tools/create-stack-user.sh su stack cd git clone https://github.com/openstack-dev/devstack.git -b stable/MY_OPENSTACK_VERSION devstack/ cd devstack/ vim local.conf # Press i to enter insert mode # Copy in the contents of the local.conf.template file below # Press esc to get out of insert mode # Type :%s/OPENSTACK_VERSION/MY_OPENSTACK_VERSION/g # e.g. :%s/OPENSTACK_VERSION/juno/g and press enter # Type :%s/DEVSTACK_PASSWORD/MY_DEVSTACK_PASSWORD/g # e.g. :%s/DEVSTACK_PASSWORD/devstacker/g and press enter # Type :x and press enter ./stack.sh -
To work with OpenStack via the web browser:
- Go to http://my.ip.v4.address
* User Name: demo
* Password:
MY_DEVSTACK_PASSWORD -
See the Getting Started Guide.
-
To work with OpenStack via the command line:
 source openrc demo demo
 openstack image list
See the Getting Started Guide.
-
To work with OpenStack via a programming language in a software development kit (SDK):
Language Guide SDK Name Go Getting Started Guide gophercloud Java Getting Started Guide Apache jclouds .NET Getting Started Guide OpenStack.NET Node.js Getting Started Guide pkgcloud PHP Getting Started Guide php-opencloud Python Getting Started Guide Python OpenStack SDK Ruby Getting Started Guide Fog -
To work with OpenStack via the API:
curl -s -X POST http://my.ip.v4.address:5000/v2.0/tokens -d '{"auth": {"passwordCredentials": {"username":"demo", "password":"MY_DEVSTACK_PASSWORD"}, "tenantName":"demo"}}' -H "Content-type: application/json" | python -m json.toolSee the Getting Started Guide and the Complete Reference.
-
To access your DevStack screen session:
 sudo chmod o+rwx /dev/pts/0
 screen -r stack
See the Quick Reference.
local.conf.template
Automate It
The above instructions are meant to be very accessible and educational for those new to OpenStack and DevStack. But sometimes DevStack instances don’t last that long. They fail in some way and it’s never worth troubleshooting a failed DevStack instance. It’s much easier to just terminate the VM and start over, in which case you can wind up doing the instructions above over and over. Clearly this calls for some automation.
There are many ways you can automate starting a VM in the cloud and running DevStack on it. You could do it with a bash script, a script in another language, Vagrant, Ansible, or whatever. To keep things relatively simple and educational with a minimum of installation we’re going to use a bash script.
There are a few extras steps before you automate everything.
Note: We’re creating these resources in the Northern Virginia (IAD) region.
- Go to the Cloud Control Panel
- Click Server > SSH Keys
- Key Name: devstacker
- Region: Northern Virginia (IAD)
- Public Key: Paste in a public key
* See how to Generate a new SSH key pair (save the key as
$HOME/.ssh/id_rsa.devstacker) - Install python-novaclient. For the instructions on that page, replace
PROJECTwithnova. - Install git.
-
Set some environment variables:
export OS_AUTH_URL=https://identity.api.rackspacecloud.com/v2.0/ export OS_REGION_NAME=IAD export OS_TENANT_ID=MY_RACKSPACE_ACCOUNT_ID export OS_USERNAME=MY_RACKSPACE_USERNAME export OS_PASSWORD=MY_RACKSPACE_PASSWORDMY_RACKSPACE_ACCOUNT_IDis found in the top right corner of the Cloud Control Panel under Account -
Run these commands:
 git clone https://github.com/etoews/devstacker.git
 cd devstacker
 ./devstacker.sh MY_OPENSTACK_VERSION MY_DEVSTACK_PASSWORD
e.g. ./devstacker.sh kilo ajbk4389iuKjknab1
Coda
This will be my last post on running DevStack. By making a couple of replacements this should work with future versions of DevStack for a long time to come. I’ll keep this post up-to-date for as long as I’m able to so if you run into problems, please let me know in the comments and I’ll fix it. Happy DevStackering!