<?xml version="1.0" encoding="utf-8"?>
<feed xmlns="http://www.w3.org/2005/Atom">
  <id>https://etoews.github.io/</id>
  <title><![CDATA[etoews]]></title>
  <link href="https://etoews.github.io/atom.xml" rel="self"/>
  <link href="https://etoews.github.io/"/>
  <generator uri="http://jekyllrb.com/">Jekyll</generator>

  
  <entry>
    <id>https://etoews.github.io/blog/2026/03/07/help</id>
    <title type="html"><![CDATA[Best Practices when Asking for Help]]></title>
    <link href="https://etoews.github.io/blog/2026/03/07/help/"/>
    <updated>2026-03-07 10:00:00 +0000</updated>
    <content type="html"><![CDATA[<p><img class="img-right" src="/img/posts/rubber-duck.png" />Asking for help is something everyone does. But when you ask for help, someone else is giving you their time and attention, a finite resource. If you put yourself in the shoes of the person helping you and make it as easy as possible for them, you’ll get better help faster. This post is geared towards getting help with problems in software development and operations, but most of the advice applies broadly.</p>

<!--more-->

<ul>
  <li><a href="#ask-gen-ai-first">Ask AI First</a></li>
  <li><a href="#search-for-solutions">Search for Solutions</a></li>
  <li><a href="#communicate-the-problem">Communicate the Problem</a>
    <ul>
      <li><a href="#in-public">In Public</a></li>
      <li><a href="#shorten-the-feedback-loop">Shorten the Feedback Loop</a></li>
      <li><a href="#what-are-you-trying-to-achieve">What Are You Trying to Achieve?</a></li>
      <li><a href="#communicate-priority-urgency-and-impact">Communicate Priority, Urgency, and Impact</a></li>
    </ul>
  </li>
  <li><a href="#provide-context">Provide Context</a>
    <ul>
      <li><a href="#provide-the-exact-command-or-link">Provide the Exact Command or Link</a></li>
      <li><a href="#see-as-much-as-you-can-at-once">See as Much as You Can at Once</a></li>
      <li><a href="#output">Output</a></li>
      <li><a href="#code-as-code-blocks">Code as Code Blocks</a></li>
      <li><a href="#screenshots">Screenshots</a></li>
      <li><a href="#logs">Logs</a></li>
    </ul>
  </li>
  <li><a href="#isolate-the-problem">Isolate the Problem</a></li>
  <li><a href="#solve-the-problem-loudly">Solve the Problem Loudly</a></li>
  <li><a href="#related-work">Related Work</a></li>
  <li><a href="#coda">Coda</a></li>
</ul>

<h2 id="ask-ai-first">Ask AI First</h2>

<p>Before asking a human, try an AI (e.g. ChatGPT, Claude, Gemini). For well-defined problems with known solutions, it’s is fast and available 24/7. Reserve human help for context-heavy, relationship-specific, or genuinely novel problems where lived experience and judgement matter.</p>

<p>Give the AI the same quality of context you’d give a human. A vague prompt gets a vague answer. A specific, well-framed question with relevant details gets a useful one. The sections below apply equally to prompting a Gen AI as they do to asking a colleague.</p>

<h2 id="search-for-solutions">Search for Solutions</h2>

<p>Maybe it goes without saying but searching for a solution yourself is a must.</p>

<p>Try to find a unique string in any error messages you’re getting and use that in your search terms.</p>

<p>Some targets for your search:</p>

<ul>
  <li>source code if it’s available</li>
  <li>product documentation</li>
  <li>chat history (Slack/Teams/IRC)</li>
  <li>good ol’ <a href="https://stackoverflow.com/">stackoverflow.com</a></li>
  <li>good ol’ <a href="https://www.google.com/">google.com</a></li>
</ul>

<h2 id="communicate-the-problem">Communicate the Problem</h2>

<h3 id="in-public">In Public</h3>

<p>I’m passionate about sharing knowledge and problem solving in public is an essential piece of that.</p>

<p>If someone asks me for help in a direct message (DM) in chat, I often reply like this.</p>

<blockquote>
  <p>Please ask these kinds of questions in a public channel (like #X or #Y) and I’ll answer you there. That way the knowledge is shared widely, more people get on the same page, and it gives others the chance to chip in with answers.</p>
</blockquote>

<p>Always encouraging people to ask questions in public normalises the behaviour and works to remove any stigma associated with seeking help publicly. If you need help with something, there’s an excellent chance someone else needs that exact same help. In my opinion, confining the help to DMs hinders the growth of the person and the organisation as a whole.</p>

<p>That’s my general rule of thumb. However, if there are people who will only ask for help in private or not at all then of course go ahead and help them in private. Continue to encourage them to open up for their own benefit and the benefit of everyone else.</p>

<p>And if the same problem requires help time and time again, it’s probably time to document it or solve the problem permanently!</p>

<h3 id="shorten-the-feedback-loop">Shorten the Feedback Loop</h3>

<p>Every round trip costs time, yours and theirs. When you ask a question, ask yourself: what will the helper ask next? Then answer it pre-emptively.</p>

<p>If you ask “is this working?” without saying what “this” is, the helper has to ask. That’s one round trip wasted before any real help begins. If instead you say “I ran <code class="language-plaintext highlighter-rouge">kubectl get pods -n prod</code> and the pod is in CrashLoopBackOff. Here’s the log output,” the helper can skip the preamble and get straight to the problem.</p>

<p>This principle extends to how you open a conversation. Don’t just say “hi” and wait for a response. Say hi and ask your question in the same message. <a href="https://nohello.net">nohello.net</a> captures this well. The helper doesn’t need to stop what they’re doing to say hi back before you’ve even asked anything, that’s friction you introduced for no reason.</p>

<h3 id="what-are-you-trying-to-achieve">What Are You Trying to Achieve?</h3>

<p>When someone is trying to help you, understanding what you’re trying to achieve can make all the difference. Sometimes you might be asking a hyper-specific question about a <em>solution</em> you’re attempting but if someone understands what you’re trying to achieve, they can look at the <em>whole problem</em> and potentially suggest a better solution. This is often referred to as the <a href="https://en.wikipedia.org/wiki/XY_problem">XY Problem</a>.</p>

<p>For example</p>

<ol>
  <li>Helpee: Why am I getting a <code class="language-plaintext highlighter-rouge">ZeroDivisionError</code> when I run my <code class="language-plaintext highlighter-rouge">rate</code> function?</li>
  <li>Helper: What are you trying to achieve?</li>
  <li>Helpee: I’m try to calculate the rate of water flow in this function in litres/minute.</li>
  <li>Helper: Can the time in minutes ever really be zero?</li>
  <li>Helpee: Not really …</li>
  <li>Helper: Validate the input at the top of the function and return an error message if <code class="language-plaintext highlighter-rouge">time &lt;= 0</code>. Please write some unit tests too. :)</li>
  <li>Helpee: Sounds good to me.</li>
</ol>

<p>The more relevant information you can give them about the whole problem, the better.</p>

<h3 id="communicate-priority-urgency-and-impact">Communicate Priority, Urgency, and Impact</h3>

<p>Helpers triage. If you don’t say how urgent something is, they’ll guess and they may guess wrong.</p>

<p>Tell them if you’re blocked entirely. Tell them if there’s a deadline. Tell them what the blast radius is. Is this affecting one user, one team, or every customer in prod? That context shapes how quickly they’ll respond and what kind of solution they’ll reach for.</p>

<p>“This is blocking our release tomorrow” and “just curious if this is the right approach” are very different asks. Make it easy for the helper to understand which one you’re bringing them.</p>

<h2 id="provide-context">Provide Context</h2>

<p>Providing context is crucial to getting help effectively.</p>

<p>Said another way, there are no dumb questions but there are incomplete questions.</p>

<h3 id="provide-the-exact-command-or-link">Provide the Exact Command or Link</h3>

<p>Precision matters. Don’t describe what you ran, share the exact command with all flags and arguments. Don’t describe where the code is, share the exact URL to the file and line number. Don’t paraphrase the error, paste the exact log entry.</p>

<p>“I ran the deploy script and got an error” leaves the helper guessing. “I ran <code class="language-plaintext highlighter-rouge">./deploy.sh --env prod --region us-east-1</code> and got <code class="language-plaintext highlighter-rouge">Error: connection refused on port 5432</code>” gives them something to work with immediately.</p>

<p>Whenever possible, share a link to the exact thing you need help with (e.g. source code, logs, documentation). A direct link saves time and reduces ambiguity. That said, share the link but also include a relevant excerpt in your message so they don’t have to navigate somewhere just to read two lines.</p>

<p><img src="/img/posts/help-others-help-you-1.png" /></p>

<h3 id="see-as-much-as-you-can-at-once">See as Much as You Can at Once</h3>

<p>Put everything relevant in one message. Think about it from the helper’s perspective: what would they need to see in order to help you without asking anything back? Try to give them that upfront.</p>

<p>A fragmented conversation where context trickles in over many messages is much harder to help with than a well-composed single message. Be succinct but be complete.</p>

<h3 id="output">Output</h3>

<p>When sharing the output of a command, always include the full command (including host info). Knowing the input that generated the output is another huge time saver.</p>

<div class="language-plaintext highlighter-rouge"><div class="highlight"><pre class="highlight"><code>[etoews@jenkins.example.com ~ ]$ ping example.com
PING example.com (93.184.216.34) 56(84) bytes of data.
^C
--- example.com ping statistics ---
4 packets transmitted, 0 received, 100% packet loss, time 2999ms
</code></pre></div></div>

<h3 id="code-as-code-blocks">Code as Code Blocks</h3>

<p>When sharing code, always share the code as a code block in your chat tool.</p>

<p>In most chat tools you can start a code block using 3 backticks like so ```.</p>

<p>Resist the temptation to share code as a screenshot but there are other good reasons to share screenshots too.</p>

<h3 id="screenshots">Screenshots</h3>

<p>When sharing screenshots, follow these guidelines.</p>

<ul>
  <li>Share the maximum amount of screen that you reasonably can.</li>
  <li>If appropriate, screenshot the entire screen because that will conveniently show the date and time as well, which is valuable info.</li>
  <li>If you can only screenshot the browser, include the location bar at the top, which is valuable info.</li>
  <li>Redact any sensitive information.</li>
  <li>Annotate the screenshot to be explicit about what you need help with.</li>
</ul>

<p><img src="/img/posts/help-others-help-you-2.png" /></p>

<h3 id="logs">Logs</h3>

<p>Logs are usually fundamental to problem solving. Remember that you can often increase logging verbosity in many systems and tools to get more output. It can be a double-edged sword because it can make it harder to find signal in the noise, but usually more info is better. And if you’ve increased the logging verbosity in a running system, remember to decrease it after the debugging is done!</p>

<h2 id="isolate-the-problem">Isolate the Problem</h2>

<p>Isolating the problem can severely reduce the time it takes to help you.</p>

<p>Let others know what you’ve tried already. That gives them more information and can stop them from chasing a red herring.</p>

<p>If you can reproduce the problem reliably and provide the steps to do so, you’re already most of the way to solving it. Those steps will help others get up to speed quickly and get you the help you need. It’s best if you can provide code or commands that can be executed to reproduce it.</p>

<p>Even isolating the problem at a coarse level can be beneficial. Providing information about whether it’s the database, network, API, or some other layer or component can save time.</p>

<h2 id="solve-the-problem-loudly">Solve the Problem Loudly</h2>

<p>Others may not be able to help right away but if you keep writing out the debugging steps you’re doing in chat, it can be a big benefit to yourself (you’re basically <a href="https://en.wikipedia.org/wiki/Rubber_duck_debugging">rubber duck debugging</a>) and others when they have time to help. You might even solve the problem yourself and be the one who helps whoever comes along next! The more text you provide, the more likely you are to find the issue when searching back through chat history.</p>

<p>Whatever happens, make sure the resolution gets recorded. Don’t leave the debugging thread dangling. There’s a good chance your future self will thank you.</p>

<p>Don’t be afraid to post to <a href="https://stackoverflow.com/">stackoverflow.com</a> if you can’t find the answer within your four walls.</p>

<h2 id="related-work">Related Work</h2>

<ul>
  <li>Julia Evans: <a href="https://jvns.ca/blog/good-questions/">How to ask good questions</a></li>
  <li>Jon Skeet: <a href="https://codeblog.jonskeet.uk/2010/08/29/writing-the-perfect-question/">Writing the perfect question</a></li>
  <li>Eric S. Raymond: <a href="http://www.catb.org/~esr/faqs/smart-questions.html">How To Ask Questions The Smart Way</a></li>
  <li>Myself: <a href="/blog/2012/12/10/write-that-request-for-help-but-dont-send-it-yet/">Write That Request For Help, But Don’t Send It…Yet</a></li>
  <li>StackOverflow: <a href="https://stackoverflow.com/help/how-to-ask">How do I ask a good question?</a></li>
  <li>Wikipedia: <a href="https://en.wikipedia.org/wiki/Rubber_duck_debugging">rubber duck debugging</a></li>
  <li>nohello: <a href="https://nohello.net">nohello.net</a></li>
</ul>

<h2 id="coda">Coda</h2>

<p>The throughline here is respect for the helper’s time. Every question you ask is an addition to someone else’s cognitive load. Making it a good question is how you make that worthwhile. The effort you put into asking well is directly proportional to the quality of help you’ll receive. And when you’re on the other side of the table, you’ll appreciate it all the more.</p>
]]></content>
  </entry>
  
  <entry>
    <id>https://etoews.github.io/blog/2022/09/03/aws-account-cleaner</id>
    <title type="html"><![CDATA[AWS Account Cleaner]]></title>
    <link href="https://etoews.github.io/blog/2022/09/03/aws-account-cleaner/"/>
    <updated>2022-09-03 10:00:00 +0000</updated>
    <content type="html"><![CDATA[<p><img class="img-right" src="/img/posts/be-a-tidy-kiwi-modern.jpg" />Whether you’re new to AWS and just learning or you’re a seasoned veteran, working with AWS usually involves extensive experimentation. That means constantly creating, reading, updating, and deleting resources as you experiment. However, sometimes you forget to delete something or AWS automatically creates associated resources that you might not even be aware of that don’t get automatically deleted. It can all amount to considerable cruft in your account, which can be quite costly in terms of dollars or cognitive load as you have to sift through resources and question whether or not they are actually necessary. Be a tidy Kiwi and keep your AWS account clean!</p>

<!--more-->

<!-- TOC -->

<ul>
  <li><a href="#choosing-an-aws-account-cleaner">Choosing an AWS Account Cleaner</a></li>
  <li><a href="#using-awsweeper">Using AWSweeper</a></li>
  <li><a href="#installation">Installation</a></li>
  <li><a href="#configuration">Configuration</a></li>
  <li><a href="#dry-run">Dry Run</a></li>
  <li><a href="#tag-filters">Tag Filters</a></li>
  <li><a href="#tag-filters-example">Tag Filters Example</a></li>
  <li><a href="#including-more-resources">Including More Resources</a></li>
  <li><a href="#coda">Coda</a></li>
</ul>

<!-- /TOC -->

<p>I have a corporate sandbox AWS account with a pre-determined budget that I can use for experimentation. As I was studying for the AWS Solution Architect Associate certification, I used this sandbox account for the hands-on labs that I was doing as part of my study. After completing just a couple of labs, I already noticed there were numerous resources that I had forgotten to delete or wasn’t even sure where they came from. Wanting to be a tidy Kiwi, I immediately went on the hunt for a tool that could help.</p>

<h2 id="choosing-an-aws-account-cleaner">Choosing an AWS Account Cleaner</h2>

<p><img class="img-right" src="/img/posts/be-a-tidy-kiwi.jpeg" />There are a number of tools that can do the job to keep an AWS account clean. I won’t go into an exhaustive comparison but I was primarily looking for a tool that met the following requirements.</p>

<ul>
  <li>Works well with AWS resource tags (important for accounts following the best practices for <a href="https://docs.aws.amazon.com/general/latest/gr/aws_tagging.html">Tagging AWS resources</a>)</li>
  <li>Supports a majority of AWS resources</li>
  <li>Reasonably well maintained</li>
</ul>

<p>In the end, I chose <a href="https://github.com/jckuester/awsweeper">AWSweeper</a>. It is flexible in how it works with resources tags, supports many AWS resources by leveraging the AWS Terraform provider, and is reasonably well maintained with many thanks to its maintainer and contributors!</p>

<h2 id="using-awsweeper">Using AWSweeper</h2>

<p>AWSweeper has <a href="https://github.com/jckuester/awsweeper#readme">good documentation</a> so I’ll just provide my experience with using it.</p>

<h2 id="installation">Installation</h2>

<p>By far, the fastest way to start using it is via <a href="https://aws.amazon.com/cloudshell/">CloudShell</a>. In a CloudShell session, follow the <a href="https://github.com/jckuester/awsweeper#binary-releases">installation instructions</a>. Double check that you’re using the most recent <a href="https://github.com/jckuester/awsweeper/releases">release</a>.</p>

<div class="language-bash highlighter-rouge"><div class="highlight"><pre class="highlight"><code><span class="o">[</span>cloudshell-user@ip-10-0-189-11 ~]<span class="nv">$ </span>curl <span class="nt">-sSfL</span> https://raw.githubusercontent.com/jckuester/awsweeper/master/install.sh | sh <span class="nt">-s</span> v0.12.0
jckuester/awsweeper info checking GitHub <span class="k">for </span>tag <span class="s1">'v0.12.0'</span>
jckuester/awsweeper info found version: 0.12.0 <span class="k">for </span>v0.12.0/linux/amd64
jckuester/awsweeper info installed ./bin/awsweeper

<span class="o">[</span>cloudshell-user@ip-10-0-189-11 ~]<span class="nv">$ </span>awsweeper <span class="nt">--version</span>
version: 0.12.0
commit: 09952ce
built at: 2022-02-08T22:59:30Z
using: go1.17.3
</code></pre></div></div>

<h2 id="configuration">Configuration</h2>

<p>AWSweeper requires a YAML file to configure it. Keep it simple to start and begin with exactly one resource type.</p>

<p>Create a file called <code class="language-plaintext highlighter-rouge">awsweeper.yaml</code> and add this one line.</p>

<div class="language-yaml highlighter-rouge"><div class="highlight"><pre class="highlight"><code><span class="na">aws_instance</span><span class="pi">:</span>
</code></pre></div></div>

<h2 id="dry-run">Dry Run</h2>

<p>Always do a dry-run of AWSweeper first before you do anything else. That gives you a baseline of what resources are already in your account.</p>

<div class="language-bash highlighter-rouge"><div class="highlight"><pre class="highlight"><code><span class="o">[</span>cloudshell-user@ip-10-0-182-207 ~]<span class="nv">$ </span>awsweeper <span class="nt">--dry-run</span> awsweeper.yaml

   • SHOWING RESOURCES THAT WOULD BE DELETED <span class="o">(</span>DRY RUN<span class="o">)</span>

        <span class="nt">---</span>
        Type: aws_instance
        Found: 3

                Id:             i-0250d2cd1c2640b16
                Tags:           <span class="o">[</span>Name: Important] <span class="o">[</span>Purpose: Prod]
                Created:        2022-09-02 04:56:30 +0000 UTC

                Id:             i-0221ae44df26eba10
                Tags:           <span class="o">[</span>Name: Temporary] <span class="o">[</span>Purpose: Experiment]
                Created:        2022-09-02 04:56:30 +0000 UTC

                Id:             i-0958016c7117fe5df
                Tags:           <span class="o">[</span>Name: No Purpose]
                Created:        2022-09-02 23:08:49 +0000 UTC

        <span class="nt">---</span>

   • TOTAL NUMBER OF RESOURCES THAT WOULD BE DELETED: 3
</code></pre></div></div>

<p>We see that there are a couple of EC2 instances in this account. They would be deleted if we weren’t doing a dry-run but even when you’re doing a real-run, there’s a confirmation step before anything is actually deleted.</p>

<h2 id="tag-filters">Tag Filters</h2>

<p>Using tag filters lets us control what AWSweeper deletes. The tag filters are pretty good but they take some getting used to. When a tag matches, that means the resource(s) are to be deleted. I found I had to do an example table like the one below for a resource to get a feel for how the “NOT” operator works for tag filters.</p>

<p>The “Purpose” table headers below mean the EC2 instance has that tag or not.</p>

<table class="table table-bordered">
  <thead>
    <tr>
      <th>Filter</th>
      <th>Purpose:&nbsp;Experiment</th>
      <th>Purpose:&nbsp;Prod</th>
      <th>No Purpose tag</th>
    </tr>
  </thead>
  <tbody>
    <tr>
      <td>
        <pre>
- tags:
    Purpose:&nbsp;Experiment</pre>
      </td>
      <td>Delete</td>
      <td>Keep</td>
      <td>Keep</td>
    </tr>
    <tr>
      <td>
        <pre>
- tags:
    Purpose:&nbsp;NOT(Experiment)</pre>
      </td>
      <td>Keep</td>
      <td>Delete</td>
      <td>Keep</td>
    </tr>
    <tr>
      <td>
        <pre>
- tags:
    NOT(Purpose):&nbsp;Experiment</pre>
      </td>
      <td>Keep</td>
      <td>Delete</td>
      <td>Delete</td>
    </tr>
    <tr>
      <td>
        <pre>
- tags:
    NOT(Purpose):&nbsp;NOT(Experiment)</pre>
      </td>
      <td>Delete</td>
      <td>Keep</td>
      <td>Delete</td>
    </tr>
  </tbody>
</table>

<h2 id="tag-filters-example">Tag Filters Example</h2>

<p>To use a tag filter, include it below the resource type you want to filter in <code class="language-plaintext highlighter-rouge">awsweeper.yaml</code>.</p>

<p>For example.</p>

<div class="language-yaml highlighter-rouge"><div class="highlight"><pre class="highlight"><code><span class="na">aws_instance</span><span class="pi">:</span>
<span class="pi">-</span> <span class="na">tags</span><span class="pi">:</span>
    <span class="na">Purpose</span><span class="pi">:</span> <span class="s">Experiment</span>
</code></pre></div></div>

<p>That tag filter would delete any EC2 instance tagged with <code class="language-plaintext highlighter-rouge">Purpose: Experiment</code>.</p>

<div class="language-bash highlighter-rouge"><div class="highlight"><pre class="highlight"><code><span class="o">[</span>cloudshell-user@ip-10-0-182-207 ~]<span class="nv">$ </span>awsweeper <span class="nt">--dry-run</span> awsweeper.yaml

   • SHOWING RESOURCES THAT WOULD BE DELETED <span class="o">(</span>DRY RUN<span class="o">)</span>

        <span class="nt">---</span>
        Type: aws_instance
        Found: 1

                Id:             i-0221ae44df26eba10
                Tags:           <span class="o">[</span>Name: Temporary] <span class="o">[</span>Purpose: Experiment]
                Created:        2022-09-02 04:56:30 +0000 UTC

        <span class="nt">---</span>

   • TOTAL NUMBER OF RESOURCES THAT WOULD BE DELETED: 1
</code></pre></div></div>

<h2 id="including-more-resources">Including More Resources</h2>

<p>Add more resources to your <code class="language-plaintext highlighter-rouge">awsweeper.yaml</code> file one by one or in small batches between dry-runs. This enables you build up your understanding of how AWSweeper will affect the resources. As you go, add tags to your resources and your <code class="language-plaintext highlighter-rouge">awsweeper.yaml</code> file as necessary to ensure nothing important gets deleted accidentally.</p>

<p>For example.</p>

<div class="language-yaml highlighter-rouge"><div class="highlight"><pre class="highlight"><code><span class="na">aws_instance</span><span class="pi">:</span>
<span class="pi">-</span> <span class="na">tags</span><span class="pi">:</span>
    <span class="na">Purpose</span><span class="pi">:</span> <span class="s">Experiment</span>
<span class="na">aws_key_pair</span><span class="pi">:</span>
<span class="pi">-</span> <span class="na">tags</span><span class="pi">:</span>
    <span class="na">Purpose</span><span class="pi">:</span> <span class="s">Experiment</span>
<span class="na">aws_security_group</span><span class="pi">:</span>
<span class="pi">-</span> <span class="na">tags</span><span class="pi">:</span>
    <span class="na">Purpose</span><span class="pi">:</span> <span class="s">Experiment</span>
</code></pre></div></div>

<p>These tag filters would delete any of those resources with tag <code class="language-plaintext highlighter-rouge">Purpose: Experiment</code>.</p>

<div class="language-bash highlighter-rouge"><div class="highlight"><pre class="highlight"><code><span class="o">[</span>cloudshell-user@ip-10-0-182-207 ~]<span class="nv">$ </span>awsweeper <span class="nt">--dry-run</span> awsweeper.yaml

   • SHOWING RESOURCES THAT WOULD BE DELETED <span class="o">(</span>DRY RUN<span class="o">)</span>

        <span class="nt">---</span>
        Type: aws_instance
        Found: 1

                Id:             i-0221ae44df26eba10
                Tags:           <span class="o">[</span>Name: Temporary] <span class="o">[</span>Purpose: Experiment]
                Created:        2022-09-02 04:56:30 +0000 UTC

        <span class="nt">---</span>


        <span class="nt">---</span>
        Type: aws_key_pair
        Found: 1

                Id:             EC2 Tutorial
                Tags:           <span class="o">[</span>Purpose: Experiment]

        <span class="nt">---</span>

   • TOTAL NUMBER OF RESOURCES THAT WOULD BE DELETED: 2
</code></pre></div></div>

<p>After many rounds of adding resources from the list of <a href="https://github.com/jckuester/awsweeper#supported-resources">Supported resources</a>, you’ll wind up with a file that looks like <a href="https://gist.github.com/etoews/fe197bf00c732bc2e30395175dc37acc">awsweeper.yaml</a>.</p>

<h2 id="coda">Coda</h2>

<p class="note">AWSweeper is a very useful tool but can be quite dangerous too. Take care to always do a dry-run before executing it for a real-run.<p>

Personally I find running AWSweeper fascinating. It gives you some real insight into what AWS is doing and how its services are stitched together.

Of course it also does an excellent job of keeping your AWS Account free of cruft and helps keep costs down to boot!
</p></p>
]]></content>
  </entry>
  
  <entry>
    <id>https://etoews.github.io/blog/2022/01/12/diagramming-is-a-solved-problem</id>
    <title type="html"><![CDATA[Diagramming is a Solved Problem]]></title>
    <link href="https://etoews.github.io/blog/2022/01/12/diagramming-is-a-solved-problem/"/>
    <updated>2022-01-12 10:00:00 +0000</updated>
    <content type="html"><![CDATA[<p><img class="img-right" src="/img/posts/drawio-logo.png" />There are numerous diagramming tools in the market and they all do a very good job of diagramming. However, almost all of them suffer from a <em>fundamental</em> problem that makes the diagrams they produce much less valuable. They make it impossible to share a rendered version of the diagram (e.g. png or jpg) that is conveniently editable. <a href="https://www.drawio.com/">drawio.com</a> has solved that problem brilliantly.</p>

<!--more-->

<!-- TOC -->

<ul>
  <li><a href="#edit-a-diagram">Edit a Diagram</a></li>
  <li><a href="#save-an-editable-diagram">Save an Editable Diagram</a></li>
  <li><a href="#share-an-editable-diagram">Share an Editable Diagram</a></li>
  <li><a href="#deploy-appdiagramsnet">Deploy app.diagrams.net</a></li>
  <li><a href="#integrations">Integrations</a></li>
  <li><a href="#coda">Coda</a></li>
</ul>

<!-- /TOC -->

<p>In software development and architecture, diagrams are enormously valuable as they can communicate an amazing amount of information at a glance. Nothing gets everyone on the same page like a good diagram. Like any documentation, diagrams can rapidly go out of date so it is absolutely essential that diagrams are conveniently editable.</p>

<p>Most of the time, diagrams are embedded in other documentation, whether it’s a wiki, website, markdown, or something else. The version that is embedded is a rendered version of the diagram (e.g. png or jpg) so it can be displayed in any browser. Rarely is the editable version included alongside the rendered version. The editable version has to be hunted down as it is typically stored elsewhere. You’re lucky if you can find it, find a version of the diagramming tool to edit it, and acquire a license to even open the diagramming tool at all. With so many barriers, it’s often impossible to update a diagram and most of its value is lost.</p>

<p><a href="https://www.drawio.com/">drawio.com</a> has solved that problem by embedding the editable version of a diagram <em>within</em> the rendered version and making it convenient and free to edit it in <a href="https://app.diagrams.net/">app.diagrams.net</a> (you can find the docs at <a href="https://www.drawio.com/doc/">drawio.com/doc/</a>).</p>

<h2 id="edit-a-diagram">Edit a Diagram</h2>

<p>Imagine you’ve come across the diagram below in some documentation. Note that it’s a png file being displayed in your browser. You can edit it right now using the instructions below.</p>

<figure>
  <img class="img-centre" title="Save this diagram and open it in app.diagrams.net to edit" alt="Scaling Communication" src="/img/posts/scaling-communication.drawio.png" />
  <figcaption style="text-align: center;">Scaling Communication<br /><sub>Save this diagram and open it in app.diagrams.net to edit</sub></figcaption>
</figure>

<p>Instructions</p>

<ol>
  <li>Right-click on the diagram and choose “Save Image As…” (or equivalent in your browser)</li>
  <li>Open <a href="https://app.diagrams.net/">app.diagrams.net</a></li>
  <li>You’ll be greeted with a dialog to “Save diagrams to:”, choose Device</li>
  <li>Choose Open Existing Diagram</li>
  <li>Choose the diagram you just saved</li>
</ol>

<p>You can now edit the diagram to your heart’s content.</p>

<h2 id="save-an-editable-diagram">Save an Editable Diagram</h2>

<p>If your browser is capable and you’ve allowed it, app.diagrams.net will actually automatically save that diagram directly to your hard drive as you update it.</p>

<p>If you’ve created a diagram from scratch, you should know how to explicitly export a rendered version with the editable version embedded.</p>

<p>Instructions</p>

<ol>
  <li>Open <a href="https://app.diagrams.net/">app.diagrams.net</a></li>
  <li>You’ll be greeted with a dialog to “Save diagrams to:”, choose Decide later</li>
  <li>Edit the diagram to your heart’s content</li>
  <li>You can save an editable version two ways:
    <ol>
      <li>File &gt; Save as …
        <ol>
          <li>In the dropdown to the right of the filename, choose “Editable Bitmap Image (.png)”</li>
          <li>Click Download</li>
        </ol>
      </li>
      <li>File &gt; Export as &gt; PNG …
        <ol>
          <li>Fill in the properties however you like</li>
          <li>Check “Include a copy of my diagram”</li>
          <li>Click Export</li>
        </ol>
      </li>
    </ol>
  </li>
</ol>

<p>You now have a diagram that can be displayed anywhere and easily edited.</p>

<h2 id="share-an-editable-diagram">Share an Editable Diagram</h2>

<p>Because your diagram is already a rendered image, it is trivial to share. Just embed or send the image wherever you need to.</p>

<p>However, your diagram is already a rendered image, it is not obvious that it’s also editable!</p>

<p>When sharing the diagram, be sure to include some indication that the diagram is editable (e.g. a caption).</p>

<p>For example, in a website like the diagram above you can use an img title attribute and/or a caption.</p>

<div class="language-html highlighter-rouge"><div class="highlight"><pre class="highlight"><code><span class="nt">&lt;figure&gt;</span>
  <span class="nt">&lt;img</span> <span class="na">class=</span><span class="s">"img-centre"</span>
       <span class="na">title=</span><span class="s">"Save this diagram and open it in app.diagrams.net to edit"</span>
       <span class="na">alt=</span><span class="s">"Scaling Communication"</span>
       <span class="na">src=</span><span class="s">"/img/posts/scaling-communication.drawio.png"</span><span class="nt">/&gt;</span>
  <span class="nt">&lt;figcaption</span> <span class="na">style=</span><span class="s">"text-align: center;"</span><span class="nt">&gt;</span>
    Scaling Communication
    <span class="nt">&lt;br/&gt;</span>
    <span class="nt">&lt;sub&gt;</span>
      Save this diagram and open it in app.diagrams.net to edit
    <span class="nt">&lt;/sub&gt;</span>
  <span class="nt">&lt;/figcaption&gt;</span>
<span class="nt">&lt;/figure&gt;</span>
</code></pre></div></div>

<h2 id="deploy-appdiagramsnet">Deploy app.diagrams.net</h2>

<p>“But what if app.diagrams.net goes down for any reason? Maybe permanently! I won’t be able to edit my diagrams!” I hear you say. It’s true that could be a problem but it’s definitely solvable.</p>

<p>The simplest solution for most people is to just <a href="https://github.com/jgraph/drawio-desktop/releases">download the Desktop version</a>, save it somewhere, install it, and use that.</p>

<p>Another option is to deploy the app.diagrams.net web application yourself. It’s relatively easy if you already have a <a href="https://github.com/">GitHub</a> account.</p>

<p>Instructions</p>

<ol>
  <li>Go to <a href="https://github.com/jgraph/drawio">github.com/jgraph/drawio</a></li>
  <li>Click Fork (in the upper right corner)</li>
  <li>In your forked repo, click Settings</li>
  <li>Click Pages</li>
  <li>In the Source section, choose Branch: dev</li>
  <li>Click Save</li>
</ol>

<p>A message will appear saying something like “Your site is published at <a href="https://etoews.github.io/drawio/">https://etoews.github.io/drawio/</a>”.</p>

<p>However, if you click the link, you’ll only see the README.md from the repo. You need to append <code class="language-plaintext highlighter-rouge">src/main/webapp/</code> to the URL in your browser.</p>

<p>The full URL will be something like <a href="https://etoews.github.io/drawio/src/main/webapp/">https://etoews.github.io/drawio/src/main/webapp/</a>. An easily hosted version of app.diagrams.net!</p>

<h2 id="integrations">Integrations</h2>

<p><a href="https://www.diagrams.net/about">JGraph</a>, the company behind app.diagrams.net, provides an amazing base feature set for free. They also offers many paid <a href="https://www.diagrams.net/integrations">integrations</a> to make using it easier for businesses. I wholeheartedly support this. If you belong to an organisation, I recommend looking these integrations to see if one fits your use case.</p>

<h2 id="coda">Coda</h2>

<p>In my opinion, <a href="https://app.diagrams.net/">app.diagrams.net</a> solves a long-standing and fundamental problem with diagramming. You’re able to embed an editable version of a diagram <em>within</em> the rendered version and it’s convenient and free to edit. Now there won’t be any excuses from keeping all diagram up to date!</p>
]]></content>
  </entry>
  
  <entry>
    <id>https://etoews.github.io/blog/2021/08/25/devops-learning-resources</id>
    <title type="html"><![CDATA[DevOps Learning Resources]]></title>
    <link href="https://etoews.github.io/blog/2021/08/25/devops-learning-resources/"/>
    <updated>2021-08-25 10:00:00 +0000</updated>
    <content type="html"><![CDATA[<p><img class="img-right" src="/img/posts/devops.png" />A curated list of learning resources I’ve used to evolve my own understanding of the principles and practices of DevOps.</p>

<!--more-->

<h2 id="articles">Articles</h2>

<ul>
  <li><a href="https://www.atlassian.com/devops/frameworks/calms-framework">CALMS Framework</a>
    <ul>
      <li>I’m actually quite partial to the CALMS framework for DevOps.</li>
    </ul>
  </li>
  <li><a href="https://martinfowler.com/articles/products-over-projects.html">Products Over Projects</a>
    <ul>
      <li>Treating software as a product is a fundamental shift required for DevOps.</li>
    </ul>
  </li>
  <li><a href="https://martinfowler.com/articles/talk-about-platforms.html">What I Talk About When I Talk About Platforms</a>
    <ul>
      <li>Technology platforms are crucial to the implementation of the technical aspects of DevOps.</li>
    </ul>
  </li>
  <li><a href="https://itrevolution.com/forum-papers/">DevOps Enterprise Summit Forum Papers</a>
    <ul>
      <li>A wealth of easily consumable knowledge and advice on all things DevOps.</li>
    </ul>
  </li>
</ul>

<h2 id="blogs">Blogs</h2>

<p>I use <a href="https://feedly.com/">Feedly</a> to subscribe to blogs. I hope RSS/Atom never dies.</p>

<ul>
  <li><a href="https://martinfowler.com/">Martin Fowler</a></li>
  <li><a href="https://container-solutions.com/blog/">Container Solutions</a>
    <ul>
      <li>Not just containers, lots of good general posts about DevOps.</li>
    </ul>
  </li>
  <li><a href="https://zwischenzugs.com/">zwischenzugs</a></li>
  <li><a href="https://www.infoq.com/Devops/articles/">InfoQ on DevOps</a></li>
</ul>

<h2 id="books">Books</h2>

<p>The first three books here are absolutely required reading.</p>

<ul>
  <li><a href="https://itrevolution.com/book/accelerate/">Accelerate</a></li>
  <li><a href="https://itrevolution.com/book/the-phoenix-project/">The Phoenix Project</a></li>
  <li><a href="https://itrevolution.com/book/the-devops-handbook/">The DevOps Handbook</a>
    <ul>
      <li>If someone says “DevOps has no definition”, hit them over the head with this book.</li>
    </ul>
  </li>
  <li><a href="https://itrevolution.com/the-unicorn-project/">The Unicorn Project</a>
    <ul>
      <li>I like to describe it as “one woman’s quest to build a development environment and unblock an entire organisation”.</li>
    </ul>
  </li>
  <li><a href="https://landing.google.com/sre/books/">Site Reliability Engineering</a></li>
  <li><a href="https://info.container-solutions.com/cloud-native-transformation-oreillly-book">Cloud Native Transformation</a></li>
</ul>

<p>Not DevOps but I highly regard these.</p>

<ul>
  <li><a href="https://www.infoq.com/minibooks/domain-driven-design-quickly/">Domain Driven Design Quickly</a></li>
  <li><a href="https://en.wikipedia.org/wiki/Thinking,_Fast_and_Slow">Thinking, Fast and Slow</a>
    <ul>
      <li>I think of it as a peek behind the curtain into what makes people think what they think and do what they do.</li>
    </ul>
  </li>
  <li><a href="https://en.wikipedia.org/wiki/The_Information:_A_History,_a_Theory,_a_Flood">The Information: A History, a Theory, a Flood</a></li>
</ul>

<h2 id="events">Events</h2>

<ul>
  <li><a href="https://devopsdays.org/">devopsdays</a>
    <ul>
      <li>A global phenomenon of DevOps practitioners getting together to learn from each other. I can’t recommend these highly enough.</li>
    </ul>
  </li>
  <li><a href="https://events.itrevolution.com/">DevOps Enterprise Summit</a></li>
</ul>

<h2 id="courses">Courses</h2>

<ul>
  <li><a href="https://www.linkedin.com/learning/devops-foundations">The DevOps Foundation video courses on LinkedIn Learning</a>
    <ul>
      <li>I know the instructors and they’re long-time practitioners of DevOps. I’d vouch for this training.</li>
    </ul>
  </li>
  <li>There are also training and accreditation organisations. Opinion on their validity varies. I’ve never done any of these so cannot vouch for them but I do know some trainers.
    <ul>
      <li><a href="https://devopsinstitute.com/">DevOps Institute</a></li>
      <li><a href="https://www.icagile.com/Learning-Roadmap/DevOps">ICAgile DevOps</a></li>
      <li><a href="https://www.devopsagileskills.org/">DevOps Agile Skills Association</a></li>
    </ul>
  </li>
</ul>

<h2 id="distributed-teams">Distributed teams</h2>

<ul>
  <li><a href="https://about.gitlab.com/2015/04/08/the-remote-manifesto/">GitLab’s Remote Manifesto</a></li>
  <li><a href="https://about.gitlab.com/handbook/">GitLab’s Handbook</a>
    <ul>
      <li>The <a href="https://about.gitlab.com/handbook/communication">Communication section</a> has some good tips on dealing with the signal-to-noise ratio in Slack.</li>
    </ul>
  </li>
</ul>

<h2 id="podcasts">Podcasts</h2>

<ul>
  <li><a href="http://devopscafe.org/">DevOps Cafe</a></li>
  <li><a href="https://www.arresteddevops.com/">Arrested DevOps</a></li>
</ul>

<h2 id="tools">Tools</h2>

<h3 id="containers">Containers</h3>

<ul>
  <li><a href="https://dockerbook.com/">The Docker Book</a>
    <ul>
      <li>A great starter book for Docker. Still relevant.</li>
    </ul>
  </li>
  <li><a href="https://github.com/kelseyhightower/kubernetes-the-hard-way">Kubernetes The Hard Way</a>
    <ul>
      <li>Working through this tutorial is a must if you’re at all serious about deploying Kubernetes.</li>
    </ul>
  </li>
</ul>

<h3 id="git">Git</h3>

<ul>
  <li><a href="https://www.atlassian.com/git/tutorials/comparing-workflows">Comparing Git Workflows</a>
    <ul>
      <li>I’m a big proponent of the feature branch workflow, potentially with forks.</li>
    </ul>
  </li>
</ul>
]]></content>
  </entry>
  
  <entry>
    <id>https://etoews.github.io/blog/2020/02/18/semver-comparison-in-a-jenkins-pipeline</id>
    <title type="html"><![CDATA[Semantic Version Comparison in a Jenkins pipeline]]></title>
    <link href="https://etoews.github.io/blog/2020/02/18/semver-comparison-in-a-jenkins-pipeline/"/>
    <updated>2020-02-18 10:00:00 +0000</updated>
    <content type="html"><![CDATA[<p><img class="img-right" src="/img/posts/jenkins.png" />Versioning is fundamental to reasoning about software development and deployment. It’s not just the software that you release that needs to be versioned. All of the supporting components need to be versioned too, such as database schemas, message formats, protocols, APIs, dependencies, etc. If you don’t version all of these components, you’re at a severe disadvantage when it comes to understanding what’s in a release or debugging a problem.</p>

<!--more-->

<!-- TOC -->

<ul>
  <li><a href="#versions">Versions</a></li>
  <li><a href="#install-jenkins">Install Jenkins</a></li>
  <li><a href="#setup-jenkins">Setup Jenkins</a></li>
  <li><a href="#configure-global-pipeline-libraries">Configure Global Pipeline Libraries</a></li>
  <li><a href="#create-pipeline">Create Pipeline</a></li>
  <li><a href="#configure-pipeline">Configure Pipeline</a></li>
  <li><a href="#run-pipeline">Run Pipeline</a></li>
  <li><a href="#pipeline-results">Pipeline Results</a></li>
  <li><a href="#coda">Coda</a></li>
</ul>

<!-- /TOC -->

<p><img class="img-right" src="/img/posts/version-all-the-things.jpg" />One popular type of versioning is known as <a href="https://semver.org/">semantic versioning</a> (semver). Semantic versioning is “a simple set of rules and requirements that dictate how version numbers are assigned and incremented.” It allows people to communicate meaning using a particular format for the version they assign to the release of a component. Whether or not you’re a fan of semver, it’s very useful to have a well-known and commonly understood specification for your versions. It also makes it possible to compare one version with another of the same component.</p>

<p>Often times, the purpose of Jenkins pipelines is to deploy software. That is to say, to change the current version of a software component to the desired version. You may want to roll forward by increasing the version of the component, you may want to roll backward by decreasing the version of the component, or you may want to do nothing at all if the version hasn’t changed. Depending on the component being deployed, you may need to take different actions based on whether the desired version is greater than, equal to, or less than the current version.</p>

<p>I’ve written the small library method <a href="https://github.com/etoews/jenkins-semver-compare/blob/master/vars/semver_compare.groovy">semver_compare</a> that allows you to compare semantic versions in a Jenkins pipeline easily. What better way to learn how to use it than by trying it out right away!</p>

<h2 id="versions">Versions</h2>

<p>At the time of writing, the versions of all of the software used in this post are:</p>

<ul>
  <li>Docker Desktop: 4.1.1</li>
  <li>Docker: 20.10.8</li>
  <li>Jenkins: Long-Term Support (LTS)</li>
</ul>

<h2 id="install-jenkins">Install Jenkins</h2>

<p>To make it convenient to install Jenkins, I’m using <a href="https://www.docker.com/products/docker-desktop">Docker Desktop</a> to get it up and running.</p>

<p>This command will run a Docker container in interactive mode (you’ll be able to see the log output in your terminal) and the container will be removed when you kill the command with a Ctrl+C. However, any changes you make to Jenkins while it’s running will be saved in the <code class="language-plaintext highlighter-rouge">jenkins_home</code> volume so you can always run it again and pick up where you left off.</p>

<div class="language-plaintext highlighter-rouge"><div class="highlight"><pre class="highlight"><code>docker run --interactive --tty --rm \
  --volume jenkins_home:/var/jenkins_home \
  --publish 8080:8080 --publish 50000:50000 \
  jenkins/jenkins:lts
</code></pre></div></div>

<p>Open Jenkins at <a href="http://localhost:8080/">http://localhost:8080/</a>.</p>

<p>Note: If you want to start over from scratch, kill the command with Ctrl+C, delete the volume with <code class="language-plaintext highlighter-rouge">docker volume rm jenkins_home</code>, and run the command above again.</p>

<h2 id="setup-jenkins">Setup Jenkins</h2>

<p>You’ll need to go through a wizard to setup Jenkins.</p>

<ol>
  <li>On the Unlock Jenkins screen:
    <ul>
      <li>Find the password in the Jenkins log output under “Please use the following password to proceed to installation”</li>
      <li>Enter the password into the Administrator password field</li>
    </ul>
  </li>
  <li>Click Install suggested plugins</li>
  <li>On the Create First Admin User screen:
    <ul>
      <li>Username:	[pick-a-username]</li>
      <li>Password: [pick-a-password]</li>
      <li>Full name: [pick-a-full-name]</li>
      <li>E-mail address: [pick-an-email-address]</li>
    </ul>
  </li>
  <li>On the Instance Configuration screen:
    <ul>
      <li>Jenkins URL: http://localhost:8080/</li>
    </ul>
  </li>
</ol>

<h2 id="configure-global-pipeline-libraries">Configure Global Pipeline Libraries</h2>

<p>To make use of the method, you’ll need to configure a <a href="https://jenkins.io/doc/book/pipeline/shared-libraries/">global pipeline library</a>.</p>

<ol>
  <li>Click <a href="http://localhost:8080/manage">Manage Jenkins</a></li>
  <li>Click <a href="http://localhost:8080/configure">Configure System</a></li>
  <li>Scroll down to the Global Pipeline Libraries section and click Add
    <ol>
      <li>Name: semver-compare-lib</li>
      <li>Default version: master</li>
      <li>Load implicitly: Unchecked</li>
      <li>Allow default version to be overridden: Checked</li>
      <li>Include @Library changes in job recent changes: Unchecked</li>
      <li>Retrieval method: Modern SCM</li>
      <li>Source Code Management: Git</li>
      <li>Git: https://github.com/etoews/jenkins-semver-compare.git</li>
    </ol>
  </li>
  <li>Save</li>
</ol>

<h2 id="create-pipeline">Create Pipeline</h2>

<p>Create a pipeline to run the example pipeline.</p>

<ol>
  <li>Click <a href="http://localhost:8080/view/all/newJob">New Item</a>
    <ol>
      <li>Enter an item name: semver-compare</li>
      <li>Click Pipeline</li>
    </ol>
  </li>
  <li>OK</li>
</ol>

<h2 id="configure-pipeline">Configure Pipeline</h2>

<p>Configure the example pipeline.</p>

<ol>
  <li>Scroll down to the Pipeline section
    <ol>
      <li>Definition: Pipeline script from SCM</li>
      <li>SCM: Git</li>
      <li>Repository URL: https://github.com/etoews/jenkins-semver-compare.git</li>
    </ol>
  </li>
  <li>Save</li>
</ol>

<h2 id="run-pipeline">Run Pipeline</h2>

<p>On the Pipeline screen:</p>

<ol>
  <li>Click Build Now</li>
  <li>Wait a moment for the pipeline to complete</li>
  <li>Under Build History click #1</li>
  <li>Click Console Output</li>
</ol>

<h2 id="pipeline-results">Pipeline Results</h2>

<p>The pipeline result is the output of running this <a href="https://github.com/etoews/jenkins-semver-compare/blob/master/Jenkinsfile">Jenkinsfile</a>.</p>

<p>First of all, notice how the Jenkinsfile itself is using a particular version of the global pipeline library with the line <code class="language-plaintext highlighter-rouge">@Library('semver-compare-lib@1.0.0')</code> at the very top. Version all the things!</p>

<p>Then the pipeline runs through successive version comparisons. Some output is printed based on whether the desired version is greater than, equal to, or less than the current version. If you were to use this in your own pipeline, you could take different actions depending on each case.</p>

<p>Finally, the last pair of versions don’t conform to the semver specification. Some error handling is invoked and a helpful error message is printed.</p>

<h2 id="coda">Coda</h2>

<p>Versioning your software components is absolutely fundamental to running a stable and resilient system that can be reasoned about. Using semantic versioning has many advantages including the ability to compare one version with another of the same component. This post showed you how you can easily make those comparisons in a Jenkins pipeline. Go ahead and give it a try in your own pipelines.</p>

<p>Note: The library method uses <a href="https://github.com/etoews/jenkins-semver-compare/blob/master/src/io/github/etoews/SemanticVersion.groovy">SemanticVersion.groovy</a> to do the comparison. The source code for that class was copied from <a href="https://raccoon.onyxbits.de/blog/single-class-java-semantic-versioning-parser-implementation/">How to implement a single class Java parser for semantic versioning with correct precedence ordering</a> with my own alterations to make it work in a Jenkins pipeline. The source code was copied and modified as permitted by the <a href="https://en.wikipedia.org/wiki/MIT_License">MIT License</a>. My thanks go out to the original author Patrick Ahlbrecht.</p>
]]></content>
  </entry>
  
  <entry>
    <id>https://etoews.github.io/blog/2019/11/07/gitops-is-reconciling-a-desired-state-in-git-with-a-runtime-environment</id>
    <title type="html"><![CDATA[GitOps is Reconciling a Desired State in Git with a Runtime Environment]]></title>
    <link href="https://etoews.github.io/blog/2019/11/07/gitops-is-reconciling-a-desired-state-in-git-with-a-runtime-environment/"/>
    <updated>2019-11-07 10:00:00 +0000</updated>
    <content type="html"><![CDATA[<p><img class="img-right" src="/img/posts/git.png" />I recently did an ignite talk at DevOpsDays Auckland 2019 about GitOps. While doing the deck for the talk, I had a chance to really reflect on question “What is GitOps?”.</p>

<!--more-->

<ul>
  <li><a href="#definition">Definition</a></li>
  <li><a href="#use-cases">Use Cases</a></li>
  <li><a href="#tooling">Tooling</a></li>
  <li><a href="#barriers">Barriers</a></li>
  <li><a href="#benefits">Benefits</a></li>
  <li><a href="#coda">Coda</a></li>
</ul>

<h2 id="definition">Definition</h2>

<p>GitOps is reconciling a desired state in Git with a runtime environment.</p>

<p>“But this is what we’ve always done!” you say. You’re right, application code in Git is eventually deployed (reconciled) to a runtime environment. However, operational code and <em>state</em> is another matter. Operational runtime environments are often not based on code, even if they’re in the cloud. Changes are made to those environments by one-time updates via a web interface or command line tool but the desired state is never stored anywhere, only the current state is stored in the runtime environment.</p>

<p>GitOps is the same general Git workflow we’ve known for years with one simple additional step.</p>

<ol>
  <li>Pull request</li>
  <li>Review</li>
  <li>Merge</li>
  <li>Action</li>
</ol>

<p>It’s that last step that distinguishes GitOps from the usual Git workflow. Automatically taking action when a commit is merged. That action takes place in a reconciliation system, which is triggered by a push or pull event. That reconciliation system then applies the desired state from Git to a runtime environment.</p>

<p>At a high level it looks like this.</p>

<p><img src="/img/posts/reconciliation-system.jpg" /></p>

<p>Some examples of the various pieces (the table is meant to be read column-wise).</p>

<table class="table table-bordered">
  <thead>
    <tr>
      <th>Git</th>
      <th>Push</th>
      <th>Pull</th>
      <th>Reconciliation System</th>
      <th>Reconcile</th>
      <th>Runtime Environment</th>
    </tr>
  </thead>
  <tbody>
    <tr>
      <td>GitHub</td>
      <td>Webhook</td>
      <td>Poll</td>
      <td>Flux</td>
      <td>SSH</td>
      <td>Kubernetes</td>
    </tr>
    <tr>
      <td>GitLab</td>
      <td></td>
      <td></td>
      <td>Jenkins</td>
      <td>File transfer</td>
      <td>Cloud (AWS, Azure, GCP, etc.)</td>
    </tr>
    <tr>
      <td>Bitbucket</td>
      <td></td>
      <td></td>
      <td>ArgoCD</td>
      <td>API call</td>
      <td>A DNS server</td>
    </tr>
  </tbody>
</table>

<p>Git is not only the source of truth for your application code but it also becomes the source of truth for your operational code. The reconciliation system could also push commits into Git to reflect a new state due to automatic events in the runtime environment (e.g. auto scaling to 5 VMs).</p>

<p>There have been a number of definitions of GitOps offered. Most notably from WeaveWorks, the people who <a href="https://www.weave.works/technologies/gitops/">coined the term GitOps</a>. However, I found that their definition and others are very Kubernetes centric and doesn’t capture the essential elements of a what is actually a more general technique.</p>

<h2 id="use-cases">Use Cases</h2>

<p>Here are a handful of use cases where you could apply GitOps. Of course, it’s not limited to these and I’d be interested to hear if you’ve applied GitOps to any other use cases.</p>

<h3 id="deployment">Deployment</h3>

<p>Deployment is one of the most common use cases for GitOps. You need to deploy a new version of some software to an environment so you make a change in Git and that software is automatically deployed to your runtime environment. <a href="https://fluxcd.io/">Flux</a> is a Kubernetes operator for doing so. I also built a system for doing so that I wrote about in <a href="/blog/2019/04/16/gitops-driven-deployments-on-openshift/">GitOps Driven Deployments on OpenShift</a>.</p>

<h3 id="infrastructure">Infrastructure</h3>

<p>Infrastructure as Code (IaC) (e.g. Terraform, CloudFormation, etc.) is perhaps the canonical use case for GitOps. You need to change your infrastructure in some way (e.g. add a VM) so you update your IaC in Git and that change is automatically run on your infrastructure. This can be done by your reconciliation system executing commands that apply the configuration to the infrastructure.</p>

<h3 id="dns">DNS</h3>

<p>I found the paper <a href="https://queue.acm.org/detail.cfm?id=3237207">GitOps: A Path to More Self-service IT</a> by Thomas A. Limoncelli really inspirational. The author does an excellent job of describing GitOps in much more general terms. The primary use case he offers as an example is for DNS.</p>

<p>In the author’s own words,</p>

<blockquote>
  <p>Initially the DNSControl configuration file (dnsconfig.js) is stored in Git. A CI system is configured so that changes trigger the test-and-push cycle of DNSControl, and updates to the file result in the changes propagating to the DNS providers. This is a typical IaC pattern. When changes are needed, someone from the IT team updates the file and commits it to Git.</p>
</blockquote>

<p>This is exactly how I’ve been thinking about GitOps.</p>

<h3 id="onoff-boarding-people">On/Off Boarding People</h3>

<p>People come and go from teams all the time. When they arrive, you have to add them to Slack, GitHub, JIRA, and all of the other systems you use to get work done. Imagine a file full of user information like this.</p>

<div class="language-yaml highlighter-rouge"><div class="highlight"><pre class="highlight"><code><span class="na">users</span><span class="pi">:</span>
<span class="pi">-</span> <span class="na">name</span><span class="pi">:</span> <span class="s">Jack Burton</span>
  <span class="na">active</span><span class="pi">:</span> <span class="kc">true</span>
  <span class="na">email</span><span class="pi">:</span> <span class="s">jack.burton@porkchopexpress.com</span>
  <span class="na">slack</span><span class="pi">:</span> <span class="s">jack-burton-me</span>
  <span class="na">github</span><span class="pi">:</span> <span class="s">jburton</span>
<span class="pi">-</span> <span class="na">name</span><span class="pi">:</span> <span class="s">Gracie Law</span>
  <span class="na">active</span><span class="pi">:</span> <span class="kc">true</span>
  <span class="na">email</span><span class="pi">:</span> <span class="s">gracie.law@porkchopexpress.com</span>
  <span class="na">slack</span><span class="pi">:</span> <span class="s">girl-with-the-green-eyes</span>
  <span class="na">github</span><span class="pi">:</span> <span class="s">glaw</span>
<span class="pi">-</span> <span class="na">name</span><span class="pi">:</span> <span class="s">David Lo Pan</span>
  <span class="na">active</span><span class="pi">:</span> <span class="kc">false</span>
  <span class="na">email</span><span class="pi">:</span> <span class="s">david.lo.pan@wingkongexchange.cn</span>
  <span class="na">slack</span><span class="pi">:</span> <span class="s">lo-pan</span>
  <span class="na">github</span><span class="pi">:</span> <span class="s">dlpan</span>
</code></pre></div></div>

<p>When a user is added/removed to/from the list, they are added/removed to/from those systems by your reconciliation system.</p>

<h2 id="tooling">Tooling</h2>

<p>A lot of tooling already has Git integration so customising tools to do GitOps isn’t much of a stretch in many cases.</p>

<p>There is also tooling cropping up that supports the GitOps technique directly:</p>

<ul>
  <li><a href="https://fluxcd.io/">Flux CD</a></li>
  <li><a href="https://jenkins-x.io/">Jenkins X</a></li>
  <li><a href="https://argoproj.github.io/argo-cd/">Argo CD</a></li>
  <li><a href="https://www.runatlantis.io/">Atlantis</a></li>
</ul>

<h2 id="barriers">Barriers</h2>

<p>Naturally there are barriers to the adoption of any new technique.</p>

<h3 id="itil">ITIL</h3>

<p>If you’re in a traditional ITIL shop, they likely have very particular processes you need to follow to implement a change. For GitOps to gain adoption, you may need to take the ITIL stalwarts along on the journey and show them how GitOps actually implements ITIL practices. And if there are parts of the process you can automate, such as opening/closing tickets, look for opportunities for your reconciliation system to integrate with ITSM systems (e.g. ServiceNow) in order to do so. I’d love to see these sorts of processes coalesce around the pull request and do away with any unnecessary ceremony.</p>

<h3 id="git-as-spof">Git as SPOF</h3>

<p>If GitOps is driving your runtime environments, Git uptime is even more critical. Git can become a single point of failure (SPOF) for essential business processes. If you use a cloud based Git service and they have a bad day, you’re going to have a bad day. If you run Git on-premise, you’ll almost certainly want to configure it to be highly available. Either way, you’ll need to seriously consider the impact on your business of Git being down.</p>

<h3 id="secrets-management">Secrets Management</h3>

<p><img class="img-right" src="/img/posts/old-lock.jpg" />Proper secrets management in any system is a tough nut to crack. Your reconciliation system needs to have access to a lot of credentials so it can update runtime environments. There are a lot of secrets management systems (e.g. Vault, CyberArk, etc.) that you can use to safely store the secrets that the reconciliation system needs to get its work done. And, of course, you want to follow best practices like only using service accounts that have exactly the permissions they need.</p>

<h2 id="benefits">Benefits</h2>

<p>In my experience I’ve found a number of benefits of GitOps.</p>

<h3 id="git-system-features">Git System Features</h3>

<p>There are many features of any modern Git system that we take for granted that are beneficial for GitOps. The role based access control (RBAC) can be used to grant access to those who can propose change and those who merge change (which implies automatic action). Being able to edit a file and propose a pull request directly from the web interface is amazingly powerful for those unfamiliar with Git. Even just getting email or Slack notifications when a pull request is proposed is helpful.</p>

<h3 id="versioning">Versioning</h3>

<p>Versioning absolutely everything that goes into your runtime environment provides many benefits. Perhaps you reconcile on every commit. In that case you may want to record the short SHA of the commit as the version of the runtime environment. Or perhaps you reconcile when a tag is pushed. In that case you may want to record the tag as the version of the runtime environment. Whatever you do, you want to know exactly what code is in your runtime environment and any point in time.</p>

<h3 id="audit">Audit</h3>

<p>Even compliance and audit benefit from GitOps. Being able to use Git history to show how and why a runtime environment is in the state it’s in is helpful for compliance. Being able to use Git history to show who proposed a change, who reviewed and approved it, and who merged it is essential for audit. In one instance, an auditor interviewed me and we got through the session in half the time because I was able to show him how we were driving deployments with GitOps with all of the benefits above.</p>

<h3 id="self-service">Self-service</h3>

<p><img class="img-right" src="/img/posts/gumball-vending-machine.jpg" />The biggest benefit is self-service. Those that need to make the change are those that propose the change. Even if they’re not familiar with Git, they’re able to use the web interface to propose the changes they need. The whole system is transparent and you’re able to understand the state it’s in, even if you don’t have direct access to the runtime environment.</p>

<h2 id="coda">Coda</h2>

<p>GitOps is a general technique that is applicable to many use cases. It’s far more than just Kubernetes. The barriers to adoption are relatively low and I think it has the potential to be a widely adopted way of working once people start to understand the benefits they can realise from it. Frankly, I just want to see more GitOps in the world.</p>
]]></content>
  </entry>
  
  <entry>
    <id>https://etoews.github.io/blog/2019/04/16/gitops-driven-deployments-on-openshift</id>
    <title type="html"><![CDATA[GitOps Driven Deployments on OpenShift]]></title>
    <link href="https://etoews.github.io/blog/2019/04/16/gitops-driven-deployments-on-openshift/"/>
    <updated>2019-04-16 10:00:00 +0000</updated>
    <content type="html"><![CDATA[<p><img class="img-right" src="/img/posts/openshift.png" alt="OpenShift" />Our industry is determined to deliver value ever more rapidly, safely, and securely across software development lifecycle environments. One way to achieve this is through GitOps. In broad terms, GitOps is about applying the Git feature workflow to operations. I took this idea and narrowed it down to exactly one use case, using Git to drive deployments on OpenShift. This is a walk-through of the concepts and components we used to enable GitOps driven deployments all the way from development to production for a real-world enterprise client deploying a payroll solution known as EdPay.</p>

<!--more-->

<!-- TOC -->

<ul>
  <li><a href="#gitops">GitOps</a></li>
  <li><a href="#users">Users</a></li>
  <li><a href="#git">Git</a></li>
  <li><a href="#pipelines">Pipelines</a></li>
  <li><a href="#environments">Environments</a></li>
  <li><a href="#openshift">OpenShift</a></li>
  <li><a href="#presentations">Presentations</a></li>
  <li><a href="#coda">Coda</a></li>
</ul>

<!-- /TOC -->

<h2 id="gitops">GitOps</h2>

<p>Another way to define GitOps is by applying a developer experience (DX) to operations. Developer Experience for APIs, SDKs, CLIs, and documentation tend to take up all of the oxygen in the room, however I propose DX for operations is an idea whose time has come. What speaks more to the experience of being a developer than interacting with Git all day. It’s natural to extend that interaction and apply it to operations as well.</p>

<p>GitOps follows this flow across four major actors to drive deployments on OpenShift:</p>

<ol>
  <li>Users</li>
  <li>Git</li>
  <li>Pipelines</li>
  <li>Environments</li>
</ol>

<p>Underlying the pipelines and environments is OpenShift. Conceivably you could also run Git on OpenShift but that was not the case at this client.</p>

<h2 id="users">Users</h2>

<p>The users of this system are the people either proposing or merging a change to an environment (env). For example, a developer has completed a feature and produced version 1.2.3 of an API service in a development environment. Once that feature is ready for testing, the developer proposes version 1.2.3 of that API service to a test env via a pull request. The test env owner reviews the pull request, approves it, and merges it. The merge fires a webhook that kicks off the pipeline run that deploys version 1.2.3 of that API service to the test env.</p>

<h2 id="git">Git</h2>

<p><img class="img-right" src="/img/posts/git.png" alt="git" />Naturally, Git provides source control but it also provide excellent access control and audit capabilities. In Git we have two types of repositories (repos).</p>

<p>Environment repos contain the configuration and versions for the services in a particular env (e.g. prod). The env repos also contain all of the settings for the repo itself to enable GitOps. This is achieved by setting repository and branch permissions, pull request rules and reviewers, and webhooks.</p>

<p>Service repos container the source code of the services that compose the application(s) running in the env. Depending on how your platform creates conatiner images, the source code may be laid out in a certain structure (e.g. <a href="https://docs.okd.io/latest/creating_images/s2i.html">Source-to-Image</a>). It can also contain deployment artifacts particular to the service such as a <a href="https://docs.okd.io/latest/architecture/core_concepts/deployments.html#deployments-and-deployment-configurations">DeploymentConfig</a>, <a href="https://docs.okd.io/latest/dev_guide/configmaps.html">ConfigMap(s)</a>, and <a href="https://jenkins.io/doc/pipeline/tour/hello-world/">Jenkinsfile</a>.</p>

<h2 id="pipelines">Pipelines</h2>

<p>Pipelines are a sequence of steps executed in Jenkins, running on OpenShift. As input, pipelines consume environment configuration and source code from Git. As output, pipelines produce container images and deployments of the EdPay application for an environment. For day to day development, the pipelines can be considered as your interface to the OpenShift Container Platform.</p>

<p>There are two types of pipelines and one type of build:</p>

<ul>
  <li>Env Pipeline: Orchestrates the deployment of the entire EdPay stack and follows a <code class="language-plaintext highlighter-rouge">deploy-&lt;env&gt;</code> naming convention (e.g. <code class="language-plaintext highlighter-rouge">deploy-dev-03-master</code>).</li>
  <li>Service Pipeline: Builds and deploys a specific service from a container image and follows a <code class="language-plaintext highlighter-rouge">deploy-&lt;service&gt;</code> naming convention (e.g. <code class="language-plaintext highlighter-rouge">deploy-edpay-services</code>).</li>
  <li>Image Build: A build of a service produces a container image stored in the registry and follows a <code class="language-plaintext highlighter-rouge">build-&lt;service&gt;</code> naming convention (e.g. <code class="language-plaintext highlighter-rouge">build-edpay-services</code>).</li>
</ul>

<h2 id="environments">Environments</h2>

<p>An environment (an OpenShift project) is a combination of running services and configuration, primarily, specific versions of the running services and the DB to which they are configured to connect. Each environment contains its own instances of all of the services that make up the EdPay application.</p>

<p>There are two types of environments:</p>

<ul>
  <li>Dev Envs: Build images and deploy services.</li>
  <li>Higher Envs: Deploy services from existing images (prod is just another higher env with the exception that the images must be copied to the prod cluster first).</li>
</ul>

<p>The primary differentiator is that dev envs do the builds that create the container images for all of the services in the stack. Dev master and dev stable are where all application builds take place. All envs do deployments of these container images.</p>

<p>It’s worth noting that the environment itself is versioned. Ultimately, the environment is just another application dependency.</p>

<h2 id="openshift">OpenShift</h2>

<p>There are two OpenShift clusters, one for production and one for non-production. The production cluster only has a staging and a prod environment. The non-production cluster has all other environments, including dev, test, demo, and pre-prod. Again, the only difference between the staging/prod pipelines from the other higher env pipelines is that the images must be copied to the prod cluster first.</p>

<h2 id="presentations">Presentations</h2>

<p>The deck below is a walk-through of the concepts and components used to enable the GitOps driven deployments described above.</p>

<iframe src="https://docs.google.com/presentation/d/e/2PACX-1vRz99WnL0jDLvVSZO_yTEX4vbatKjEX3KnUtVGOg2vTvm2RmVRNrAxxG7oqROCNklr_yaNj1k9vUVsJ/embed?start=false&amp;loop=false&amp;delayms=999999999" frameborder="0" width="750" height="445" allowfullscreen="true" mozallowfullscreen="true" webkitallowfullscreen="true"></iframe>

<p>Because there are a fair number of concepts and components at play, I also did a screencast to explain the system.</p>

<iframe width="750" height="420" src="https://www.youtube.com/embed/4mk0Q4UyNjY" frameborder="0" allow="accelerometer; autoplay; encrypted-media; gyroscope; picture-in-picture" allowfullscreen=""></iframe>

<p>And finally, my colleague Heather Cumberworth-Lane and I presented on this at the Cloud Native Summit 2019 in Wellington, NZ.</p>

<iframe width="750" height="420" src="https://www.youtube.com/embed/fxAc6PQHuNY" frameborder="0" allow="accelerometer; autoplay; encrypted-media; gyroscope; picture-in-picture" allowfullscreen=""></iframe>

<h2 id="coda">Coda</h2>

<p class="note"><strong>Note:</strong> Always set <a href="https://docs.okd.io/latest/dev_guide/compute_resources.html#dev-compute-resources">limits on compute resources</a>. Always! We learned this one the hard way when we deployed <a href="https://www.jaegertracing.io/">Jaeger Tracing</a> on OpenShift and it began to cause node instability. My solution was to <a href="https://github.com/jaegertracing/jaeger-openshift/pull/102">add max traces and compute resource parameters</a> to the Jaeger Tracing OpenShift all-in-one template.</p>

<p>The ideas and concepts for a system like this have been rattling around in my head for a long time. It’s been great getting the opportunity to build it out. I had assistance from a few people around me at the client that worked hard to bring this to life. Without their help and support this wouldn’t have been possible and my thanks go out to them.</p>

<p>Update: I’ve also written a general definition that <a href="/blog/2019/11/07/gitops-is-reconciling-a-desired-state-in-git-with-a-runtime-environment/">GitOps is Reconciling a Desired State in Git with a Runtime Environment</a>.</p>
]]></content>
  </entry>
  
  <entry>
    <id>https://etoews.github.io/blog/2019/01/18/2019-01-18-microsoft-teams-norms</id>
    <title type="html"><![CDATA[Microsoft Teams Norms]]></title>
    <link href="https://etoews.github.io/blog/2019/01/18/2019-01-18-microsoft-teams-norms/"/>
    <updated>2019-01-18 10:00:00 +0000</updated>
    <content type="html"><![CDATA[<p><img class="img-right" src="/img/posts/teams.png" />
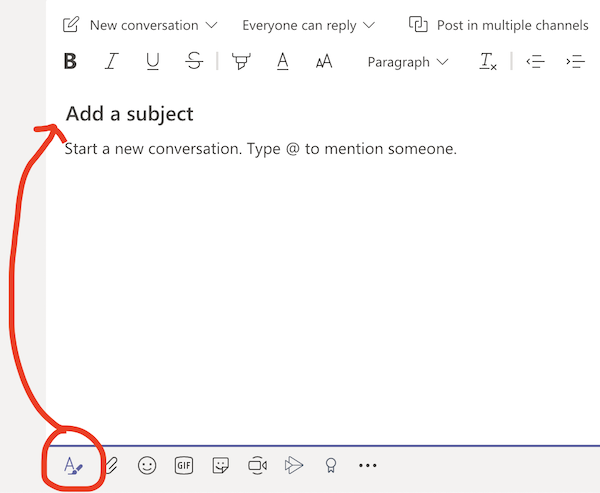
Face to face communication is essential. It’s a necessary and irreplaceable form of communication. Chat also has numerous benefits. However, it’s best to establish some norms around the use of chat to realise those benefits and avoid some of the pitfalls.</p>

<!--more-->

<!-- TOC -->

<ul>
  <li><a href="#overview">Overview</a></li>
  <li><a href="#norms">Norms</a></li>
  <li><a href="#teams-and-channels">Teams and Channels</a></li>
  <li><a href="#tips-n-tricks">Tips ‘n Tricks</a>
    <ul>
      <li><a href="#general">General</a></li>
      <li><a href="#threads">Threads</a></li>
      <li><a href="#message-formatting">Message Formatting</a></li>
      <li><a href="#notifications">Notifications</a></li>
    </ul>
  </li>
  <li><a href="#getting-help">Getting Help</a></li>
  <li><a href="#coda">Coda</a></li>
</ul>

<!-- /TOC -->

<h2 id="overview">Overview</h2>

<p>Here is a high level overview of those norms.</p>

<ul>
  <li>Be mindful of people’s time and attention.</li>
  <li>Keep chats as public as possible.</li>
  <li>Use common courtesy. “Please” and “Thank you” still go a long way.</li>
  <li>Assume good intentions (tone doesn’t travel well over chat) and asynchronous comms.</li>
  <li>Management must take care when to intervene (like any medium).</li>
</ul>

<h2 id="norms">Norms</h2>

<p>These norms are shamelessly borrowed from the <a href="https://about.gitlab.com/handbook/communication/#chat">GitLab Communication Handbook on Chat</a>. I recommend reading through that doc, picking and choosing the ones that make the most sense for your org, and fitting them to your purpose.</p>

<ul>
  <li>If you use chat, please use a public channel and mention the person or group you want to reach. This ensures it is easy for other people to chime in, involve other people if needed, and learn from whatever is discussed. Only use direct messages if the discussion is truly private and of no interest to anyone else.</li>
  <li>If the subject is of value to the wider community, consider commenting on an existing user story or opening a new user story and linking to that story in a relevant channel.</li>
  <li>Despite the instantaneous nature of chat, it should be considered asynchronous communication. Don’t expect an instantaneous response; you have no idea what the other person is doing.</li>
  <li>If you must send a private message, don’t start a conversation with “Hi” or “Hey” as that interrupts their work without communicating anything. If you have a quick question, just ask the question directly and the person will respond asynchronously. If you truly need to have a synchronous communication, then start by asking for that explicitly, while mentioning the subject. e.g. “I’m having trouble understanding issue #x, can we talk about it quickly?”.</li>
  <li>Do not feel obligated to respond to chat messages when you are not working.</li>
  <li>Feel free to send a colleague a link to these guidelines if the communication in Teams should be done asynchronously.</li>
  <li>Please avoid using @General or @channel unless this is about something urgent and important. In chat try to keep the use of keywords that mention the whole channel to a minimum. They should only be used for pings that are both urgent and important, not just important. By overusing channel mentions you make it harder to respond to personal mentions in a timely manner since people get pinged too frequently.</li>
  <li>If something is important but not urgent - like complimenting or encouraging the entire team - use email or post in the channel without @-mentioning the team.</li>
  <li>If you are aware that your teammate is on vacation, avoid mentioning them in a high volume channel. It will be difficult to find the information or question when they return. If you need to ensure they refer back to the thread, ensure to send them a link to the relevant Teams message through a direct message.</li>
  <li>It’s not rude to leave a channel. When you’re no longer interested in the conversations happening in a channel, feel free to leave it so it won’t distract you anymore.</li>
</ul>

<h2 id="teams-and-channels">Teams and Channels</h2>

<ul>
  <li>Create a “random” channel. Naturally people feel chatty and that should be encouraged! The random channel is for discussing anything whatsoever: games, pets, kids, TV, haircuts, home repair, etc. It also helps keep the non-work chat in one place so it doesn’t clutter up work chat and make it harder to find signal in the noise.</li>
  <li>User lowercase only for Channels and Teams with words separated by hyphens as Teams sorts by case then alphanumeric.</li>
  <li>When deciding whether to create a Channel or a Team, always lean towards creating a Channel:
    <ul>
      <li>If it is the same/similar context as an existing Team and doesn’t need privacy then create a Channel within the existing Team.</li>
      <li>If it needs a smaller more private group then consider creating a Team.</li>
    </ul>
  </li>
</ul>

<h2 id="tips-n-tricks">Tips ‘n Tricks</h2>

<p>Like any tool, it’s necessary to learn at least some of the tip ‘n tricks to be effective with it (and have a little more fun too).</p>

<h3 id="general">General</h3>

<ul>
  <li><a href="https://www.youtube.com/watch?v=FFQszYALS_A">Brief introduction to Microsoft Teams</a>.</li>
  <li>General help can be found in <a href="https://support.office.com/en-us/article/chat-in-microsoft-teams-f3a917cb-1a83-42b2-a097-0678298703bb">Chat in Microsoft Teams</a>.</li>
  <li>There’s a web app available at <a href="https://teams.microsoft.com/">teams.microsoft.com</a>.</li>
  <li>All keyboard shortcuts can be found under Profile &gt; Keyboard shortcuts.</li>
  <li>Use Ctrl/Command + / to open the list of commands.</li>
</ul>

<h3 id="threads">Threads</h3>

<ul>
  <li>Every chat in Teams starts in a thread. Be conscious of where you’re typing (especially if you’re in the mobile app) to make sure you’re responding to the right thread.</li>
  <li>If it’s going to be a long running thread, you’ll want to add a subject to it to make it easier to find when scrolling back through the chat history.
  <img src="/img/posts/teams-thread-subject.png" /></li>
  <li>If you hover your mouse over any message, a few icons appear in the top right corner. Use the thumbs up icon to agree with someone without sending another message/notification to the channel.</li>
  <li>When your cursor is in the reply textbox, you can press the Up Arrow to edit your last message.</li>
</ul>

<h3 id="message-formatting">Message Formatting</h3>

<ul>
  <li>When writing a message, you can <a href="https://support.office.com/en-us/article/use-markdown-formatting-in-teams-4d10bd65-55e2-4b2d-a1f3-2bebdcd2c772">Use Markdown formatting in Teams</a>.</li>
  <li>To share code, use ``` to start a multi-line code block or ` to start an inline code snippet.</li>
  <li>Sharing code as a screen shot is grounds for mockery.</li>
  <li>Use Shift+Enter to start a new line in a message rather than sending every line as a message (and a notification).</li>
  <li>You can insert an emoji by typing a <code class="language-plaintext highlighter-rouge">:</code> and then typing the name of the emoji.</li>
  <li>Links expand to show a preview of the page. You can remove these previews by clicking the X in the top right corner of the preview.</li>
</ul>

<h3 id="notifications">Notifications</h3>

<ul>
  <li>If you’re only referring to someone, but don’t actually need their attention, and want to spare them from getting notified, spell out their name normally without @ mentioning them.</li>
  <li>You can manage your availability status under Profile.</li>
  <li>Manage your notifications (Profile &gt; Settings &gt; Notifications) carefully to avoid notification fatigue. Here’s one example of notification settings that can help you get started.
  <img src="/img/posts/teams-notifications.png" /></li>
</ul>

<h2 id="getting-help">Getting Help</h2>

<ul>
  <li>Don’t just share the output of a command/process, include the command/process that generated the output. Context is crucial to debugging!</li>
  <li>Share direct links to things when possible rather than vaguely describing how to access something.
    <ul>
      <li>e.g. “read <a href="https://stackoverflow.com/questions/26405380/how-do-i-correctly-setup-and-teardown-my-pytest-class-with-tests/39401087#39401087">my answer</a> on pytest” rather than “just go to that question on pytest and look around for my answer”
        <blockquote class="twitter-tweet" data-lang="en"><p lang="en" dir="ltr">Just link people to stuff please. It&#39;s the HT in HTTP and HTML.</p>&mdash; Everett Toews (@etoews) <a href="https://twitter.com/etoews/status/723173231016833025?ref_src=twsrc%5Etfw">April 21, 2016</a></blockquote>
        <script async="" src="https://platform.twitter.com/widgets.js" charset="utf-8"></script>
      </li>
    </ul>
  </li>
  <li>Asking for help is a common and natural thing that <em>everyone</em> does. You need help right away so if you can help others help you, everyone wins. Getting help from others is a bit different in chat so I wrote the guide <a href="/blog/2026/03/07/help/">Help Others Help You</a>.</li>
</ul>

<h2 id="coda">Coda</h2>

<p>It’s easy to get started with chat. However, it’s also just as easy to use it the wrong way. If you establish and reinforce some norms, it can be enormously beneficial to the whole organisation.</p>
]]></content>
  </entry>
  
  <entry>
    <id>https://etoews.github.io/blog/2018/12/03/openshift-learning-resources</id>
    <title type="html"><![CDATA[OpenShift Learning Resources]]></title>
    <link href="https://etoews.github.io/blog/2018/12/03/openshift-learning-resources/"/>
    <updated>2018-12-03 10:00:00 +0000</updated>
    <content type="html"><![CDATA[<p><img class="img-right" src="/img/posts/openshift.png" />A curated list of learning resources I’ve used as I’ve climbed the learning curve on OpenShift.</p>

<!--more-->

<h2 id="experiment">Experiment</h2>

<p>Get your hands dirty in a safe environment by using <a href="https://docs.openshift.org/latest/minishift/index.html">installing and using MiniShift</a>. Or you can skip localhost and use the <a href="https://www.openshift.com/products/online/">Starter plan for OpenShift online</a>. These are good for developers but not as good for learning how to admin an OpenShift cluster.</p>

<p>If you want to get great idea of what’s going on under the hood, there’s no better way than learning from <a href="https://github.com/kelseyhightower/kubernetes-the-hard-way">Kubernetes The Hard Way</a>. It’s an excellent tutorial on building a Kubernetes (the foundation of OpenShift) cluster “by hand” so you understand how all of the components work together.</p>

<h2 id="training">Training</h2>

<ul>
  <li><a href="https://learn.openshift.com/">Interactive Learning Portal</a></li>
  <li><a href="https://www.redhat.com/en/services/certification/rhcsa">Red Hat Certified System Administrator</a></li>
  <li><a href="https://www.redhat.com/en/services/training/all-courses-exams?f%5B0%5D=taxonomy_courses_by_curriculum%3AOpenShift">Red Hat OpenShift Training</a></li>
</ul>

<h2 id="docs">Docs</h2>

<p>The <a href="https://docs.openshift.com/container-platform/latest/welcome/index.html">official docs</a> are quite good.</p>

<p>Note that if you’re Googling for results, most times you wind up at an older version of the docs. It’s usually just a simple matter of editing the URL in your location bar to get to the version you need.</p>

<p>Also note that you can use <code class="language-plaintext highlighter-rouge">latest</code> in place of the version (as I do in the links below) and you’ll be redirected to the latest version of the docs.</p>

<h3 id="developer">Developer</h3>

<ul>
  <li><a href="http://platform.deloitte.com.au/articles/2017/openshift-3-demystified-for-developers/">OpenShift 3 Demystified. For Developers</a></li>
  <li><a href="https://docs.openshift.com/container-platform/latest/dev_guide/index.html">Developer Guide</a></li>
  <li><a href="https://docs.openshift.com/container-platform/latest/security/index.html">Container Security Guide</a></li>
  <li><a href="https://docs.openshift.com/container-platform/latest/creating_images/index.html">Creating Images</a></li>
  <li><a href="https://docs.openshift.com/container-platform/latest/using_images/index.html">Using Images</a></li>
  <li><a href="https://docs.openshift.com/container-platform/latest/cli_reference/index.html">CLI Reference</a></li>
</ul>

<h3 id="admin">Admin</h3>

<ul>
  <li><a href="https://docs.openshift.com/container-platform/latest/admin_guide/index.html">Cluster Administration</a></li>
</ul>

<h3 id="ops">Ops</h3>

<ul>
  <li><a href="https://docs.openshift.com/container-platform/latest/day_two_guide/index.html">Day Two Operations Guide</a></li>
  <li><a href="https://docs.openshift.com/container-platform/latest/upgrading/index.html">Upgrading Clusters</a></li>
</ul>

<h2 id="books">Books</h2>

<p>These books are a decent intro. However, they both focus heavily on the imperative approach and skip the declarative approach to Infra as Code. Meaning they focus on running a bunch of commands sequentially via the CLI vs declaring the infra as code (manifests) and applying them. The latter being a more mature approach to container management.</p>

<ul>
  <li><a href="https://www.openshift.com/deploying-to-openshift/">Deploying to OpenShift</a></li>
  <li><a href="https://www.openshift.com/devops-with-openshift/">DevOps with OpenShift</a></li>
</ul>

<h2 id="blogs">Blogs</h2>

<p>To keep up with the rapid evolution I find it very valuable to subscribe to blogs. I’m old school and still use RSS/Atom for this sort of thing with <a href="https://feedly.com/">Feedly</a>.</p>

<h3 id="openshift">OpenShift</h3>

<ul>
  <li><a href="https://blog.openshift.com/">Red Hat’s official OpenShift blog</a></li>
  <li><a href="https://developers.redhat.com/blog/category/topics/containers/">Red Hat’s official Developer blog (Containers category)</a></li>
  <li><a href="http://www.opensourcerers.org/category/paas/openshift/">OpenShift category of the Open Sourcerer’s blog</a> (it’s gone a bit quiet)</li>
</ul>

<h3 id="kubernetescontainers">Kubernetes/Containers</h3>

<ul>
  <li><a href="https://thenewstack.io/">The New Stack</a>
    <ul>
      <li>All the new and shiny. Vendor heavy. Yet still useful/informative.</li>
    </ul>
  </li>
  <li><a href="https://kubernetes.io/blog/">Kubernetes Blog</a></li>
  <li><a href="https://technologyconversations.com/">Technology Conservations</a></li>
  <li><a href="https://container-solutions.com/blog/">Container Solutions</a></li>
</ul>

<p>The last few are Kubernetes related but it gives you a good idea where OpenShift is going.</p>

<h2 id="podcasts">Podcasts</h2>

<ul>
  <li><a href="https://blog.openshift.com/tag/podctl/">PodCTL</a></li>
  <li><a href="https://kubernetespodcast.com/">Kubernetes Podcast</a></li>
</ul>

<h2 id="specific-topics">Specific Topics</h2>

<h3 id="networking">Networking</h3>

<ul>
  <li><a href="https://medium.com/google-cloud/understanding-kubernetes-networking-pods-7117dd28727">Understanding kubernetes networking: pods</a></li>
  <li><a href="https://medium.com/google-cloud/understanding-kubernetes-networking-services-f0cb48e4cc82">Understanding kubernetes networking: services</a></li>
  <li><a href="https://medium.com/google-cloud/understanding-kubernetes-networking-ingress-1bc341c84078">Understanding kubernetes networking: ingress</a></li>
</ul>

<h3 id="networking-deep-dive">Networking Deep Dive</h3>

<p>I can’t recommend this series highly enough. The back-of-the-napkins diagrams alone are worth the read.</p>

<ul>
  <li><a href="http://www.opensourcerers.org/openshift-3-1-networking-from-a-containerworkload-point-of-view-part-1-container-networking-on-a-plain-docker-host/">Part 1: Container networking on a plain Docker host</a></li>
  <li><a href="http://www.opensourcerers.org/openshift-networking-from-a-containerworkload-point-of-view-part-2-container-networking-on-an-openshift-node/">Part 2: Container networking on an OpenShift node</a></li>
  <li><a href="http://www.opensourcerers.org/openshift-networking-from-a-containerworkload-point-of-view-part-3-container-networking-across-openshift-nodes/">Part 3: Container networking across OpenShift nodes</a></li>
  <li><a href="http://www.opensourcerers.org/openshift-networking-from-a-containerworkload-point-of-view-part-3-container-networking-using-openshiftkubernetes-services/">Part 4: Container networking using OpenShift/Kubernetes services</a></li>
  <li><a href="http://www.opensourcerers.org/openshift-networking-from-a-containerworkload-point-of-view-part-5-openshift-router/">Part 5: OpenShift router</a></li>
  <li><a href="http://www.opensourcerers.org/openshift-networking-from-a-containerworkload-point-of-view-part-6-controlling-egress-traffic/">Part 6: Controlling egress traffic</a></li>
</ul>

<h3 id="ingress-traffic">Ingress Traffic</h3>

<ul>
  <li><a href="https://blog.openshift.com/openshift-router-sharding-for-production-and-development-traffic/">OpenShift Router Sharding for Production and Development Traffic</a></li>
  <li><a href="https://docs.openshift.com/container-platform/3.9/architecture/networking/routes.html#router-sharding">Router Sharding</a></li>
</ul>

<h3 id="egress-traffic">Egress Traffic</h3>

<ul>
  <li><a href="https://docs.openshift.com/container-platform/3.9/admin_guide/managing_networking.html#admin-guide-controlling-egress-traffic">Controlling Egress Traffic</a></li>
  <li><a href="https://blog.openshift.com/accessing-external-services-using-egress-router/">Accessing External Services Using Egress Router</a></li>
  <li><a href="https://docs.openshift.com/container-platform/3.9/admin_guide/managing_networking.html#enabling-static-ips-for-external-project-traffic">Enabling Static IPs for External Project Traffic</a></li>
  <li><a href="https://www.redhat.com/en/blog/how-enable-static-egress-ip-red-hat-openshift-container-platform">How to enable static egress IP in Red Hat OpenShift Container Platform</a></li>
</ul>

<h3 id="dns">DNS</h3>

<ul>
  <li><a href="https://zwischenzugs.com/2017/10/21/openshift-3-6-dns-in-pictures/">OpenShift 3.6 DNS In Pictures</a></li>
</ul>

<h3 id="authn">AuthN</h3>

<ul>
  <li><a href="https://docs.openshift.com/container-platform/latest/architecture/additional_concepts/authentication.html">Authentication</a></li>
  <li><a href="https://docs.openshift.com/container-platform/latest/install_config/configuring_authentication.html">Configuring Authentication</a></li>
  <li><a href="https://docs.openshift.com/container-platform/latest/install_config/syncing_groups_with_ldap.html">Syncing Groups With LDAP</a></li>
</ul>

<h3 id="authz">AuthZ</h3>

<ul>
  <li><a href="https://docs.openshift.com/container-platform/latest/architecture/additional_concepts/authorization.html">Authorization</a></li>
  <li><a href="https://docs.openshift.com/container-platform/latest/admin_guide/manage_rbac.html">Managing Role-based Access Control</a></li>
  <li><a href="https://docs.openshift.com/container-platform/latest/admin_guide/manage_users.html">Managing Users</a></li>
  <li><a href="https://github.com/openshift-evangelists/openshift-cookbook/tree/master/users-and-role-based-access-control">Users and RBAC Cookbook</a></li>
</ul>

<h3 id="disaster-recovery">Disaster Recovery</h3>

<ul>
  <li><a href="https://keithtenzer.com/2018/03/21/disaster-recovery-with-containers-you-bet/">Disaster Recovery with Containers? You Bet!</a></li>
</ul>
]]></content>
  </entry>
  
  <entry>
    <id>https://etoews.github.io/blog/2017/08/27/managing-env-vars-and-secrets-in-kubernetes</id>
    <title type="html"><![CDATA[Managing Environment Variables and Secrets in Kubernetes]]></title>
    <link href="https://etoews.github.io/blog/2017/08/27/managing-env-vars-and-secrets-in-kubernetes/"/>
    <updated>2017-08-27 10:00:00 +0000</updated>
    <content type="html"><![CDATA[<p><img class="img-right" src="/img/posts/top-secret.jpg" /><a href="https://12factor.net/config">Providing configuration to applications via environment variables</a> (env vars) is one of the principles of twelve-factor apps. If that configuration contains sensitive information like credentials, the best way to do that is using Secrets in Kubernetes. There are a lot of different ways to manage env vars and Secrets in Kubernetes. Here are a few things I do to make working with them more convenient.</p>

<!--more-->

<p>The versions used in this post at the time of writing are:</p>

<ul>
  <li><a href="https://kubernetes.io/docs/getting-started-guides/minikube/">Minikube</a>: 0.21.0</li>
  <li><a href="https://www.virtualbox.org/">VirtualBox</a>: 5.1.22</li>
  <li><a href="https://kubernetes.io/">Kubernetes</a> and <a href="https://kubernetes.io/docs/tasks/tools/install-kubectl/">kubectl</a>: 1.7.0</li>
</ul>

<h2 id="create-a-minikube-and-get-the-code">Create a minikube and get the code</h2>

<script src="https://gist.github.com/etoews/8d7bcafb5e26e9b96735ade35505f5c5.js?file=minikube-and-code.sh"></script>

<h2 id="setup-the-configuration">Setup the configuration</h2>

<p>You need to get env vars into apps running on Kubernetes but, at least in your development environment, it can also be really convenient to have those env vars in your terminal session. For that reason, you can store your env vars as simple scripts that can be sourced.</p>

<p>Knowing that you’ll have multiple environments, it’s good to start with a template for that script. To avoid conflicts, prefix all of your env vars with some shorthand for your app.</p>

<script src="https://gist.github.com/etoews/8d7bcafb5e26e9b96735ade35505f5c5.js?file=template.sh"></script>

<p>Create a directory called envs for all of your config. Include a .gitignore to avoid committing any sensitive info and a README.md to let people (and your-later-self) know how to use the template.</p>

<div class="language-plaintext highlighter-rouge"><div class="highlight"><pre class="highlight"><code>envs/
├── .gitignore
├── README.md
├── dev.sh
├── staging.sh
├── template.sh
└── test.sh
</code></pre></div></div>

<p>Ignore everything except the few initial files in the dir.</p>

<script src="https://gist.github.com/etoews/8d7bcafb5e26e9b96735ade35505f5c5.js?file=.gitignore"></script>

<p>Naturally you’d want to expand on these instructions in the README.md.</p>

<script src="https://gist.github.com/etoews/8d7bcafb5e26e9b96735ade35505f5c5.js?file=README.md"></script>

<h2 id="setup-a-development-environment">Setup a development environment</h2>

<script src="https://gist.github.com/etoews/8d7bcafb5e26e9b96735ade35505f5c5.js?file=terminal.sh"></script>

<h2 id="create-the-secrets-and-a-deployment">Create the Secrets and a Deployment</h2>

<p>You can provide the config as key/value pairs using <a href="http://tldp.org/LDP/abs/html/process-sub.html">process substitution</a>.</p>

<script src="https://gist.github.com/etoews/8d7bcafb5e26e9b96735ade35505f5c5.js?file=kubectl.sh"></script>

<h2 id="ps1-context">PS1 Context</h2>

<p>If you’re working with many different app envs, it can be helpful to include some context in your PS1. Here’s one example of including a bit more context on your command line. For a more thorough PS1, checkout my <a href="https://gist.github.com/etoews/e5a51e54ec7355a2d6716bfbf6c08fe2">.bash_profile</a>.</p>

<div class="language-bash highlighter-rouge"><div class="highlight"><pre class="highlight"><code><span class="nv">PS1</span><span class="o">=</span><span class="s1">'(kubernetes:$(kubectl config current-context 2&gt;&amp;1) | foo:$(echo ${FOO_ENV}))\n\W $ '</span>
</code></pre></div></div>

<h2 id="coda">Coda</h2>

<p>Obviously this can be used in many more places than just database configuration. It’s a great way to configure your apps too. These environment variables can even be used in <a href="/2017/07/29/inject-an-executable-script-into-a-container-in-kubernetes/">injected executable scripts</a>, which makes for a pretty powerful way to configure containers on the fly.</p>

<p>One improvement I’d like to make to this setup is to always have the env var file encrypted on disk. Whenever you needed the env vars in a terminal session, you would decrypt the file and source it. All in-memory so the decrypted version is never stored on disk.</p>
]]></content>
  </entry>
  
</feed>
